Building your own Vue rich text component
- Published
- Tags
- vuecomponentsrich text
If you're like me, when you're building a web application, you'll often come to moment where you need new functionality to enable the feature you're delivering.
For example, you might need touch events for a carousel, or a quick tooltip, or to be notified when an element changes size. There are great libraries to do all of these things. But without noticing it, you might find your bundle size is increasing disproportionate to the functionality you need. So, for example, if you're using hammerjs just to enable mobile touch events - don't! There's a great API that is just as simple to engage with.
The problem: heavy rich-text components
However, this really came alive for me recently. As part of our functionality with Parent Scheme, we allow users to save answers to coaching questions embedded throughout the site. And at some point, rather than using a basic autosizing textarea, we decided to allow rich text, and grabbed the fantastic tiptap, a beautifully designed, renderless rich-text editor for Vue.js that wraps Prosemirror.
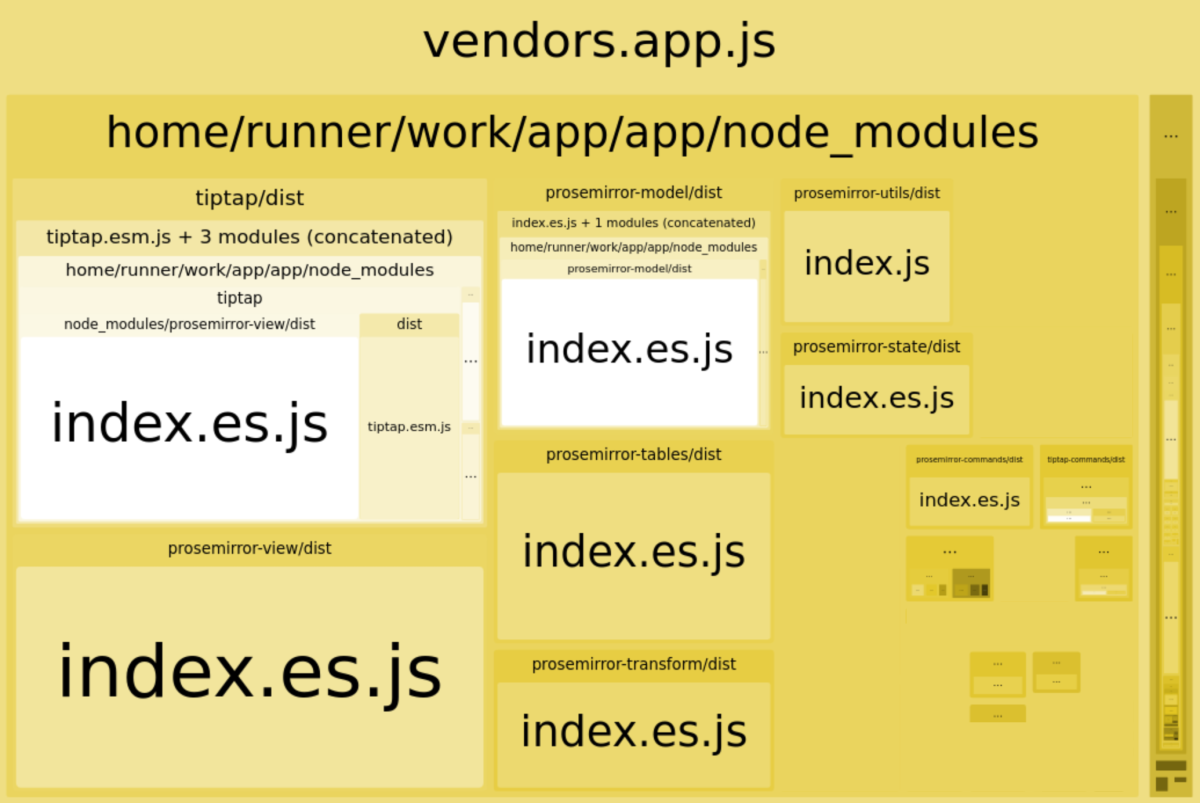
It worked fantastically well, and we were able to roll out a great user experience immediately. But we soon noticed that it added extra weight to our webpack bundle. How much? 359kB of parsed JS!

That might have been worth it for an app more centred around the editor experience, but it wasn't for us. So we started looking for alternatives.
Pell - a tiny rich text editor
There are other libraries, like Quill, Squire, and so on. Most have a pretty heavy dependency chain, and those that are lighter tend not to have the functionality we wanted - such as the ability to use Markdown shortcuts.
So rather than aim for minor improvements, why not start as simple as possible and build in required functionality?
Pell, for example, is just 3.54kB minified - just 1% of our previous bundle size with tiptap.
It renders something like this:

Vue makes it very easy to pull in a library with a custom wrapper component, and there are packages that do that with Pell. But, to be honest, that's probably the wrong thing to do. The base library is so simple that it's a great foundation for building your own rich text editor Vue component. And I wanted to make sure we supported Markdown shortcuts -- automatically creating bulleted lists after typing *, for example. So this is a good example of when it's best to re-implement functionality directly in Vue.
Building our own rich text editor
So, how might you build your own Vue rich text component using the techniques Pell does?
The magic takes place using the HTML element attribute contenteditable (see MDN). Add this attribute to an element and the browser provides an API to edit raw HTML. As long as we're happy to ingest HTML output, this is perfect for a lightweight rich text editor experience.
So here's our basic Vue template:
<template>
  <div contenteditable @input="handleInput" @keydown="handleKeydown" />
</template>
It's beautifully simple. (If you need to support IE, you can listen to keyup instead.) Note that we haven't bound the innerHTML to value because that would have the effect of resetting the cursor position on keystroke.
We're going to use execCommand to control the formatting of the HTML within the contenteditable element. Bear in mind that execCommand is deprecated and may behave inconsistently across browsers -- but for simple things like we need here, it's fine.
Now we need to implement a handler for input events.
<script lang="ts">
const exec = (command: string, value?: string) =>
  document.execCommand(command, false, value)

const queryCommandValue = (command: string) =>
  document.queryCommandValue(command)

export default {
  props: {
    value: { type: String, default: '' },
  },
  mounted() {
    this.$el.innerHTML = this.value
  },
  // We need to ensure we update the innerHTML when it changes,
  // without resetting the cursor.
  watch: {
    value(newValue) {
      if (this.$el.innerHTML !== newValue) this.$el.innerHTML = newValue
    },
  },
  methods: {
    // We emit changes as HTML. Alternatively you could serialise
    // the innerHTML, which might require debouncing the input
    // for performance reasons.
    handleInput(e: InputEvent | KeyboardEvent) {
      const { firstChild } = e.target as HTMLElement

      if (firstChild && firstChild.nodeType === 3) exec('formatBlock', '<p>')
      else if (this.$el.innerHTML === '<br>') this.$el.innerHTML = ''

      this.$emit('input', this.$el.innerHTML)
    },

    // You could use a handler like this to listen to
    // the `keyup` event in IE.
    handleDelayedInput(e: KeyboardEvent) {
      this.$nextTick(() => this.handleInput(e))
    },
  },
}
</script>
Now we have a basic working component that will serve as a foundation for extension. For example:
// Here we can handle keyboard shortcuts.
handleKeydown(e: KeyboardEvent) {
  if (
    e.key.toLowerCase() === 'enter' &&
    queryCommandValue('formatBlock') === 'blockquote'
  ) {
    this.$nextTick(() => exec('formatBlock', '<p>'))
  } else if (e.ctrlKey) {
    switch (e.key.toLowerCase()) {
      case 'b':
        e.preventDefault()
        this.$nextTick(() => exec('bold'))
        break

      case 'i':
        e.preventDefault()
        this.$nextTick(() => exec('italic'))
        break

      case 'u':
        e.preventDefault()
        this.$nextTick(() => exec('underline'))
        break

      default:
        break
    }
  }
},
This is a pretty basic example. Obviously, it's possible to do a whole lot more, including listening for patterns of keystrokes. And -- caveat emptor -- for anything too much more complicated, it would probably be worth using a rich text component like tiptap that doesn't rely on contenteditable or document.execCommand.